
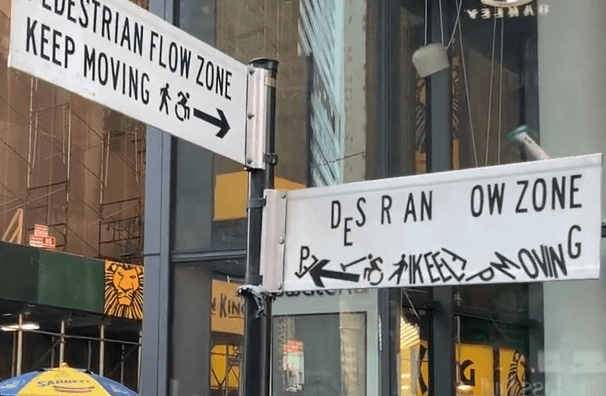
Remember the amazing “Textless” short by Gareth Smith & Jenny Lee?
Well, here’s our own tutorial that recreates the workflow to achieve this amazing effect where the content of a sign is falling drove by physics.
We are going to use Adobe After Effects, Mocha AE to track the sign and Newton for the physic simulation. Illustrator to vectorize the artwork and Photoshop to clean up the sign using the content aware tool.
That’s a lot of tools for an amazing result. But don’t worry, everything is going to be quite easy to do.
“Textless” by Gareth Smith & Jenny
🤔 Need to download our tools or get a trial version?
🧑🏽💻 You're not alone if you need help! Open a support ticket or join our Discord server!
Start by creating a new composition from your footage. Then, bring it into Mocha AE for stabilization.
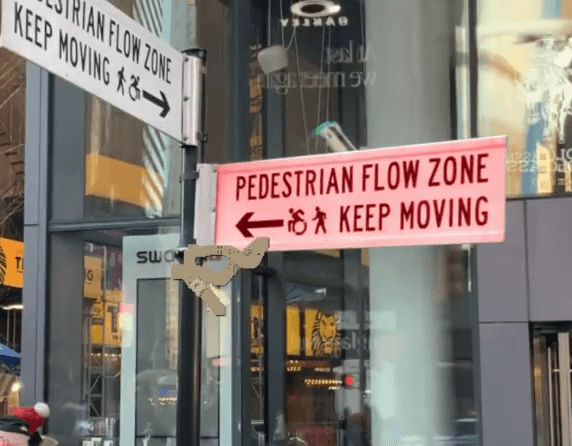
Once stabilized, duplicate your footage and create a Freeze Frame at the moment when the sign is most front-facing. Pre-compose this element and note the frame number where it was frozen.
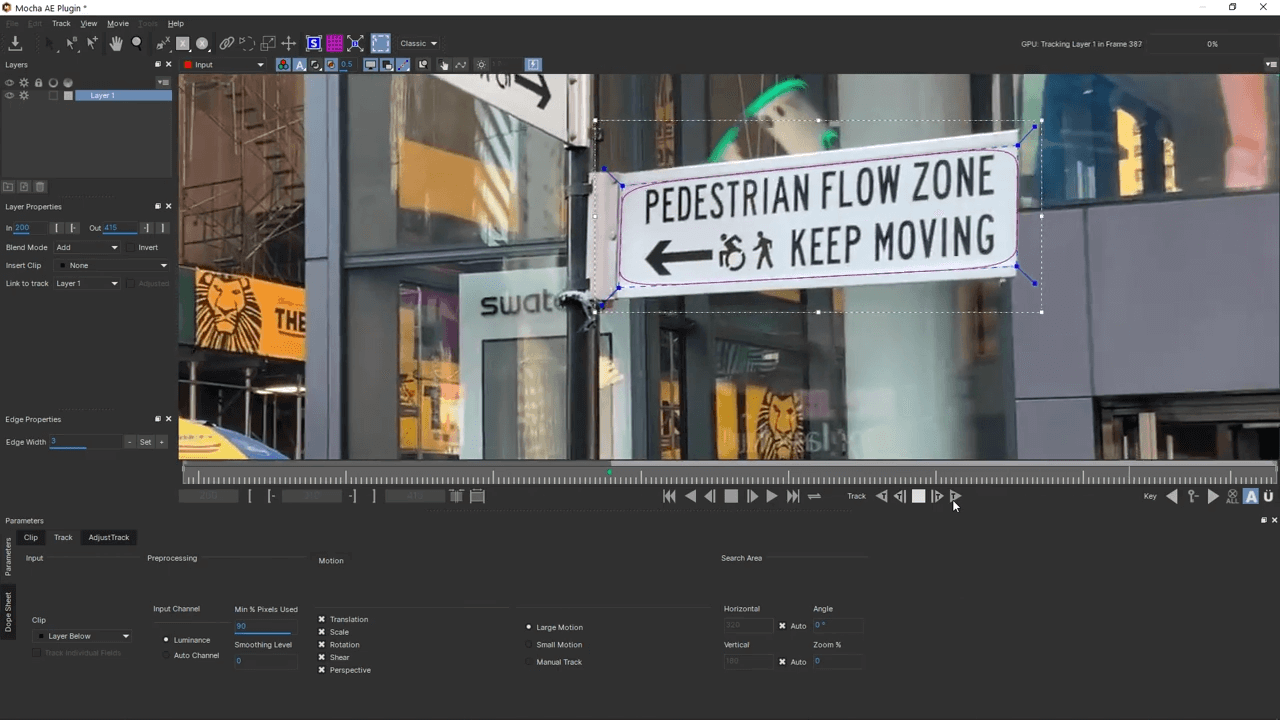
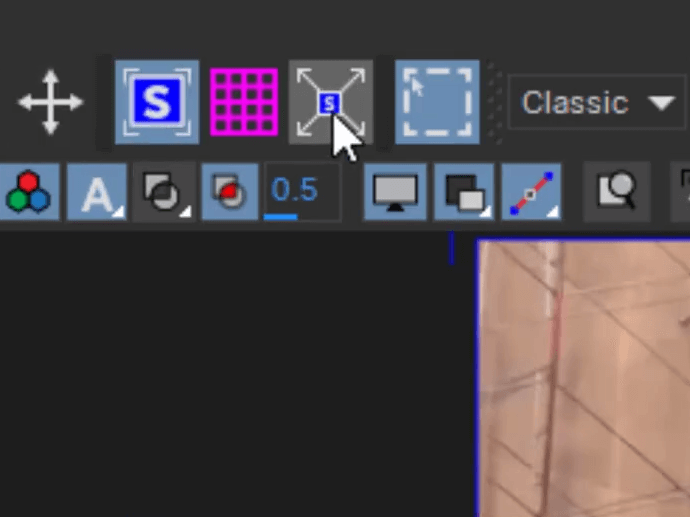
Reopen Mocha AE and at the noted frame and click on expand planar. Save your work and return to After Effects.
In After Effects, generate the tracking data and ensure that your sign is properly stabilized and warped within your composition.
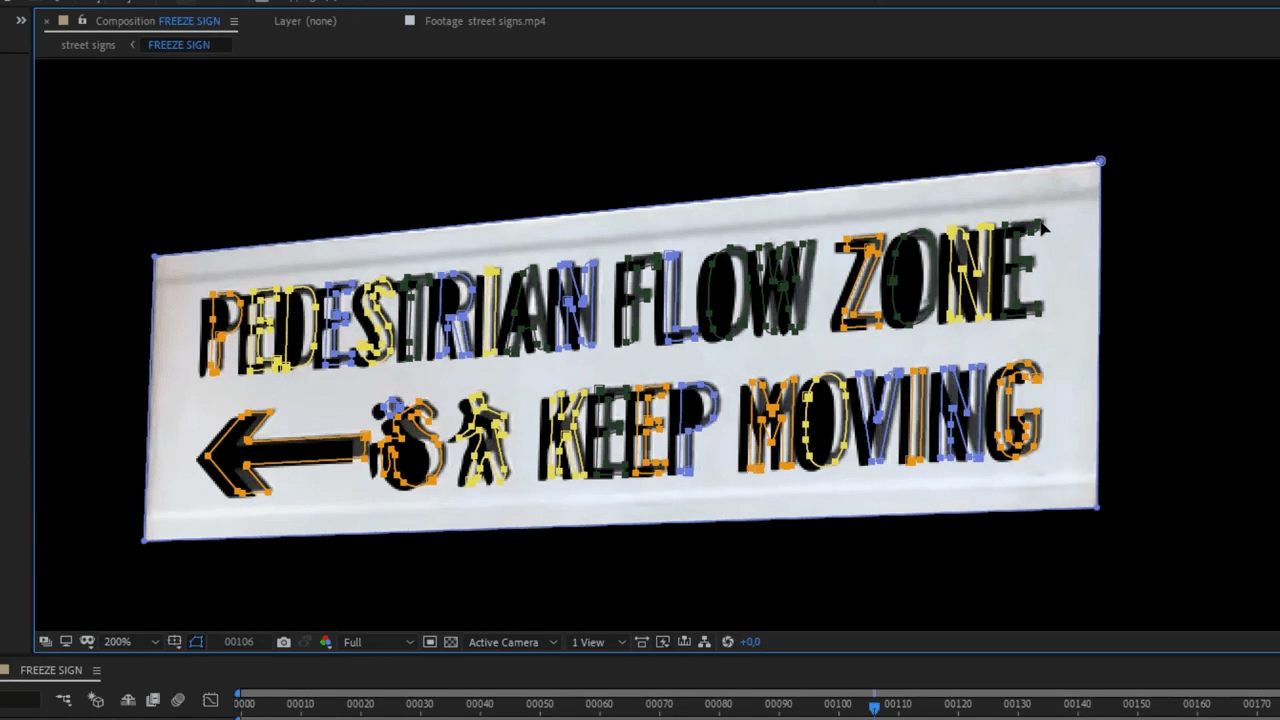
Export your sign to Adobe Illustrator and use the Image Trace module to vectorize it. Clean up the paths to keep only the necessary outer contours.

Copy and paste these vector paths back into After Effects as masks.
Open the mask that act as a frame so it appears only as an outline inside Newton.

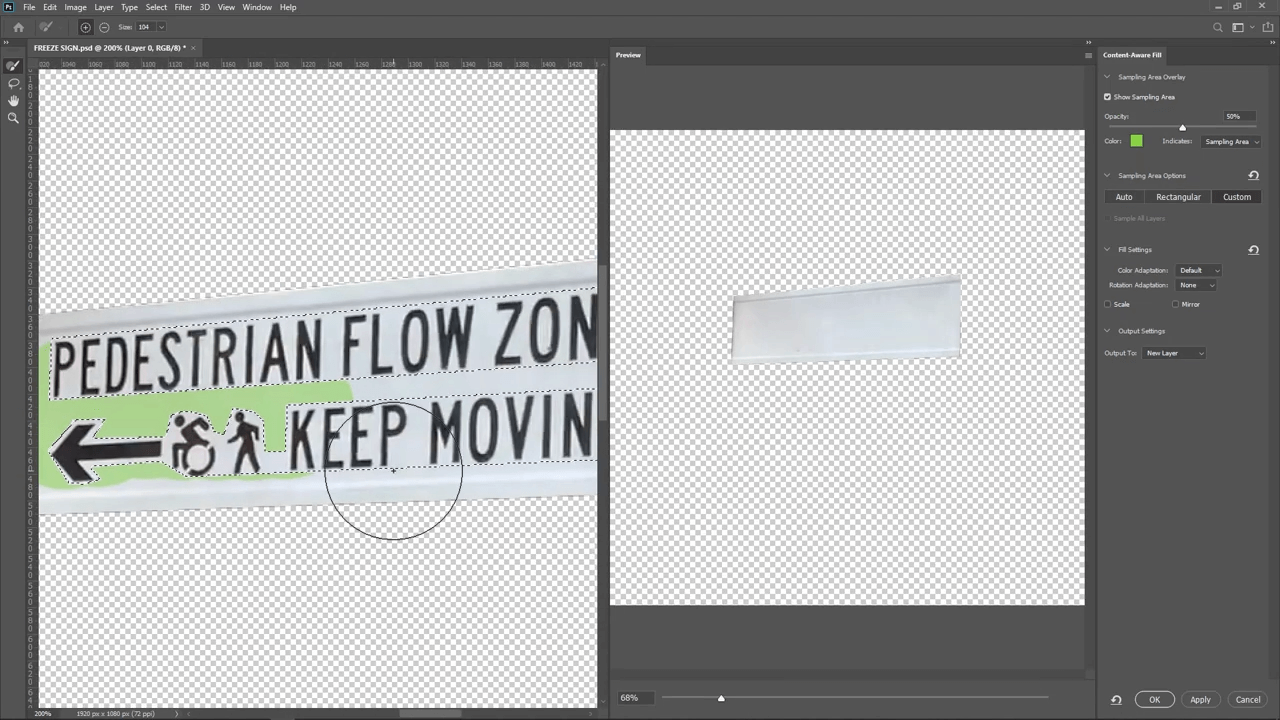
Open your sign in Adobe Photoshop and remove the content, keeping only the background intact.
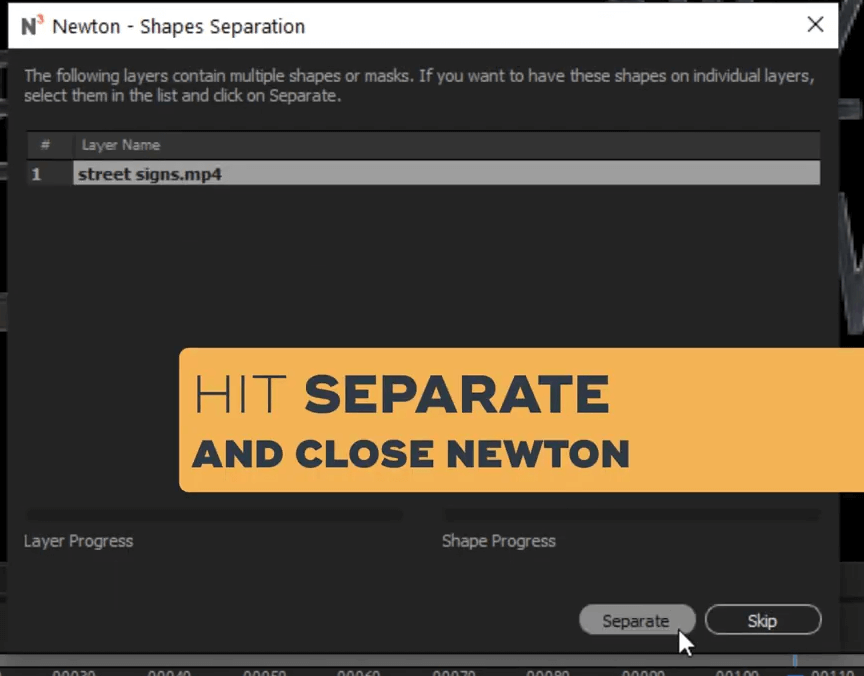
Launch Newton. When prompted, choose to separate the elements, then immediately close Newton. This will ensure that each mask is placed on its own layer.
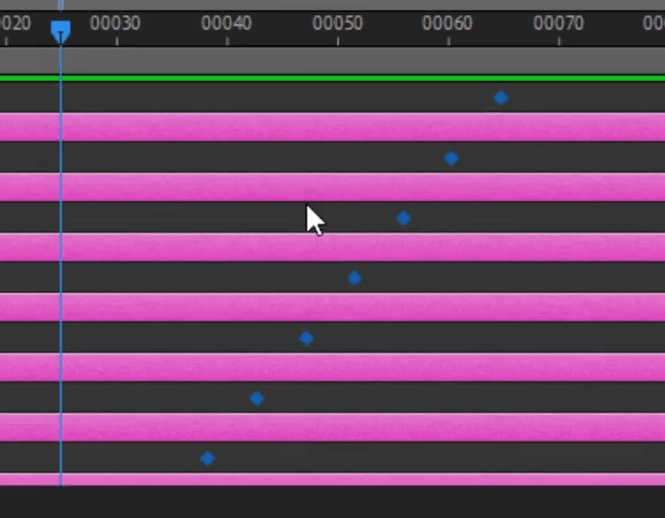
Before reopening Newton, rename your elements and assign labels to organize them easily. Add an animation key at frame 25, marking the moment when the layers will be influenced by physics. Make sure these keys are slightly staggered to create natural movement.
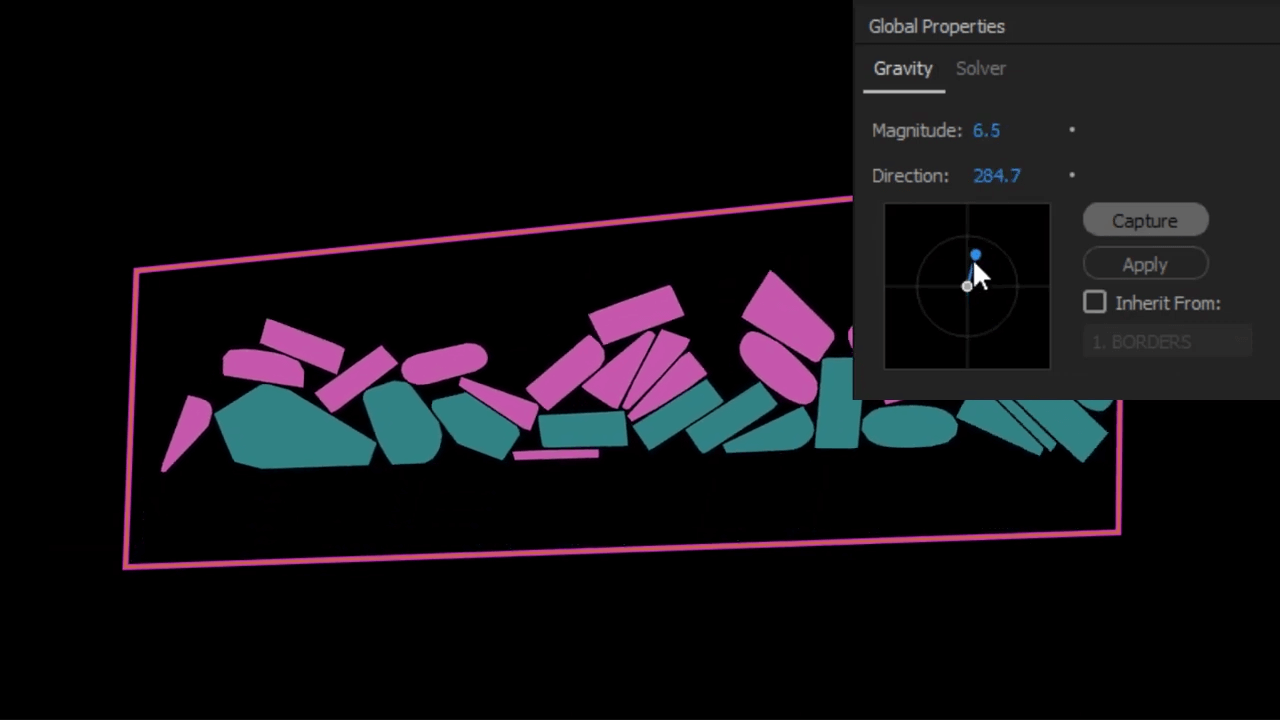
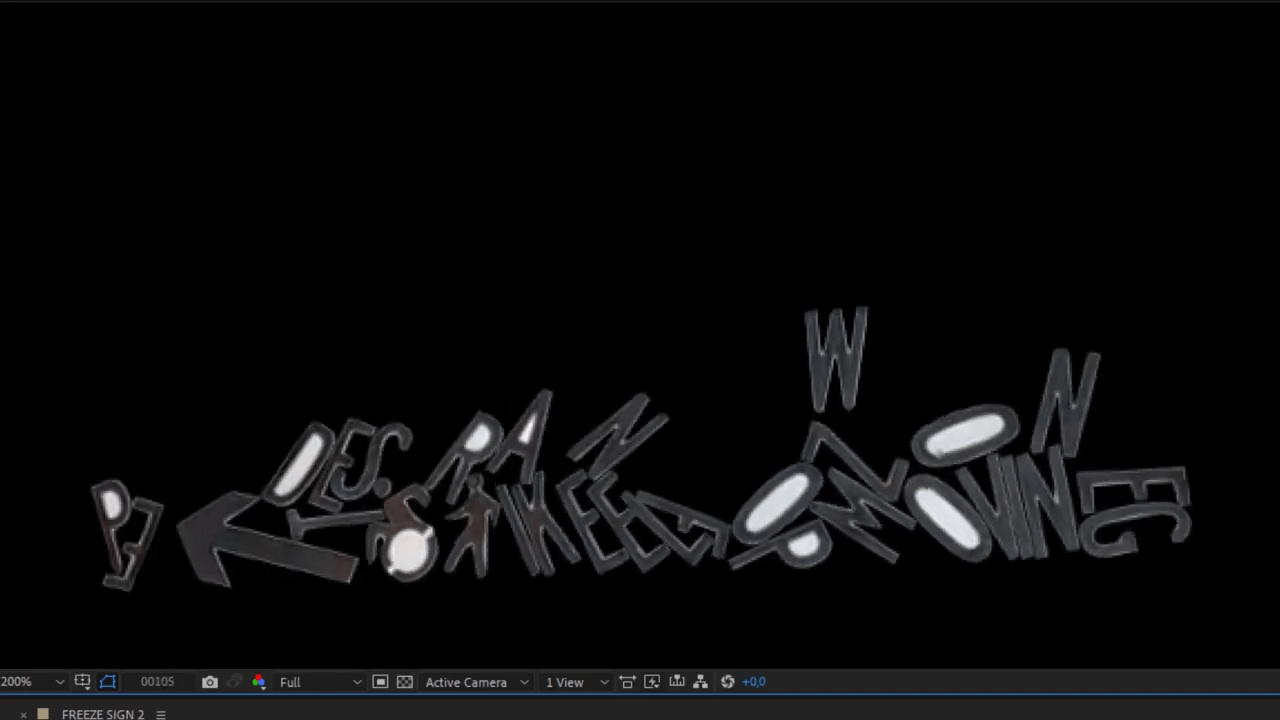
Reopen Newton for the fun part! Select the objects with animation keys and set them as Kinematic. The rest should be set to Dormant.
Adjust the physics parameters until you get a simulation that looks right. For a smoother preview, use the Use Convex Hull option. You can also record the gravity animation during the preview.
Once satisfied with your animation, render it.
Back in After Effects, replace your original composition with the Newton-generated composition—and you’re done!
Now, enjoy your realistic, physics-driven sign animation!
If you need more in depth about the tracking with Mocha AE, check the great tutorial of Mark Christiansen at School Of Motion:
Link to the video used in this tutorial .
Music: Otis McDonald.