This video tutorial will show you how to create a dynamic typography animation in Adobe After Effects using Newton and LayerGenerators, along with a little help from ChatGPT.
We'll also explore how to add a scribbling finish touches with our plugin Plotter.
Get our tools for Adobe After Effects : https://aescripts.com/mobo-super-suite/
Join our Discord server!
Step-by-Step Guide
Step 1: Setting Up the Composition
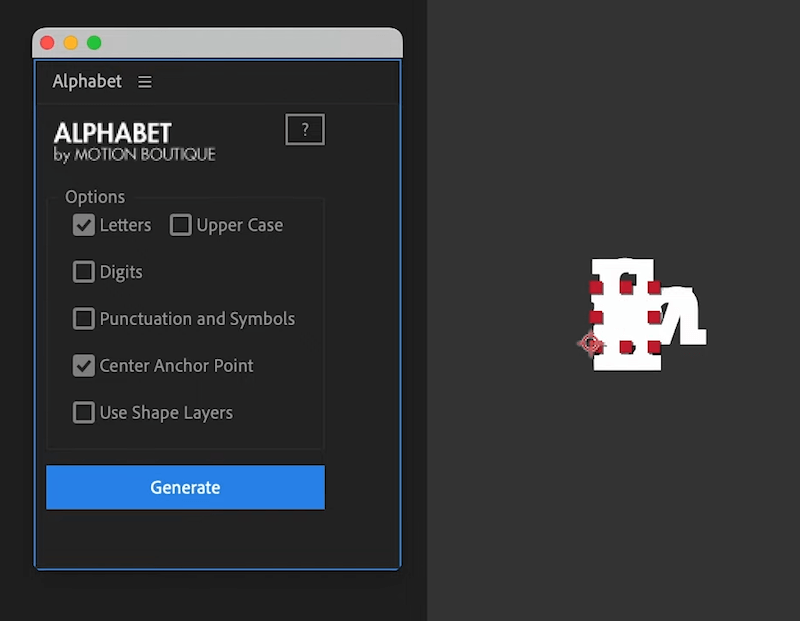
We start by creating a portrait-mode composition in After Effects. Then, we generate a text layer containing a single letter in white. Instead of manually creating an entire alphabet, we use the Alphabet script (part of Layer Generators, available on aescripts.com) to quickly generate all letters.
To create a visually appealing animation, we:
- Set the font size to 230.
- Duplicate the alphabet six times to achieve a balanced composition.
- Align and center all layers within the view.
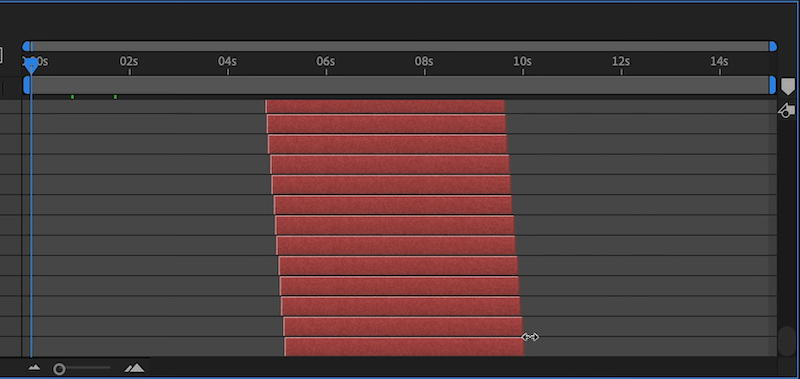
Step 2: Sequencing the Layers
To animate the letters appearing one by one:
- Select all text layers.
- Shift them to the left to make them appear one frame at a time.
- Use Keyframe Assistant → Sequence Layers to stagger their start times.
- Stretch all layers to around 10 seconds for a smooth transition.
This method creates a progressive reveal of each letter.
Step 3: Optimizing for Newton4
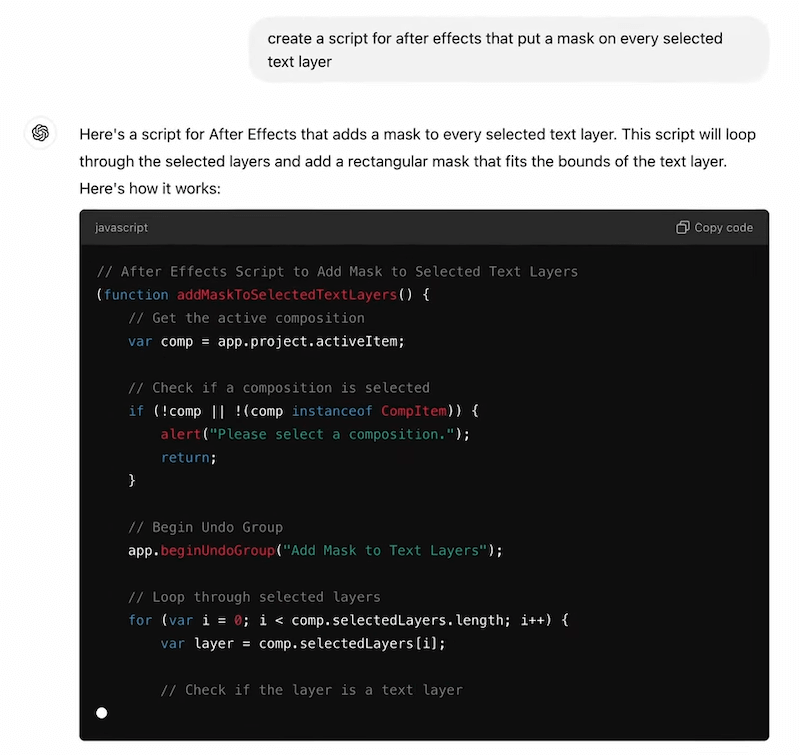
Instead of simulating complex letter shapes in Newton4 (which would be computationally heavy), we use a simpler method:
- Generate a mask on each letter to reduce polygon count.
- Use ChatGPT to create a script that applies rectangular masks to all selected text layers.
- Save the script as a .jsx file and execute it in After Effects.
Now, each letter has a simplified bounding box, making the Newton simulation faster and more efficient.
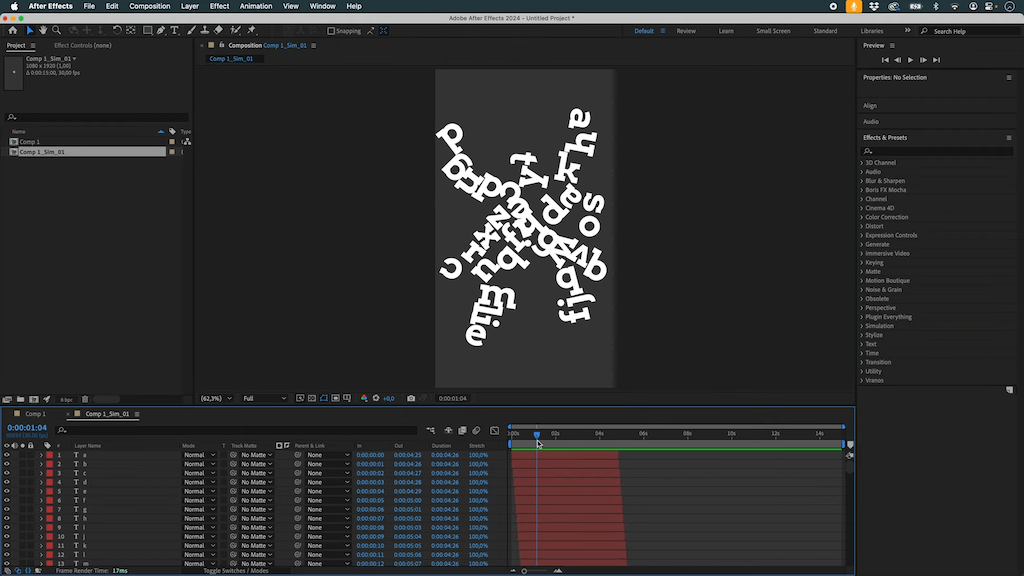
Step 4: Running the Newton4 Simulation
In Newton 4, we:
- Set the letters as dynamic objects.
- Define walls on all four sides of the composition.
- Disable gravity for a floating effect.
- Increase sub-steps for better accuracy.
- Apply randomization to position, rotation, and angular velocity to add variety.
After running the simulation, we render the new composition with the transformed letter movement.
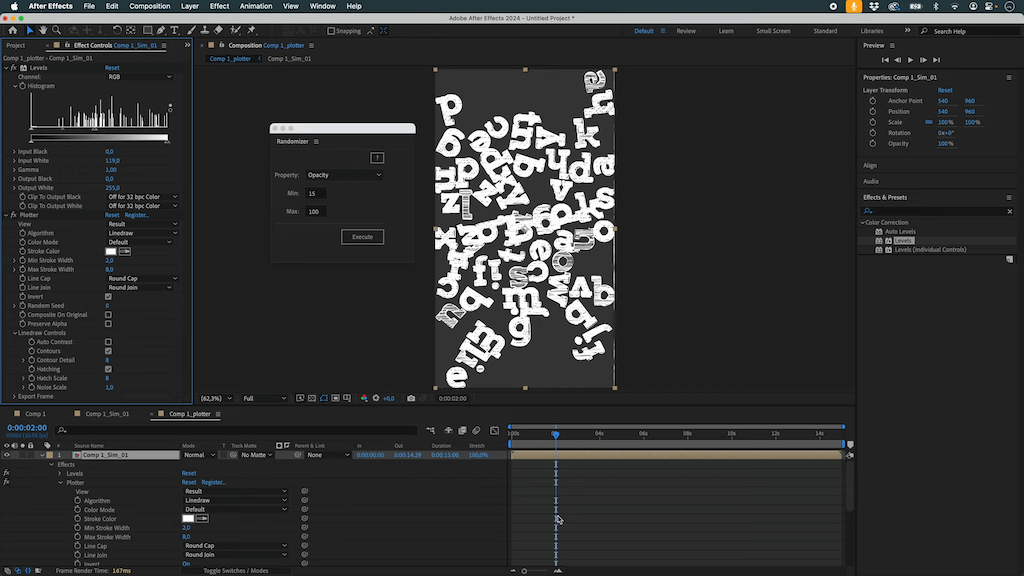
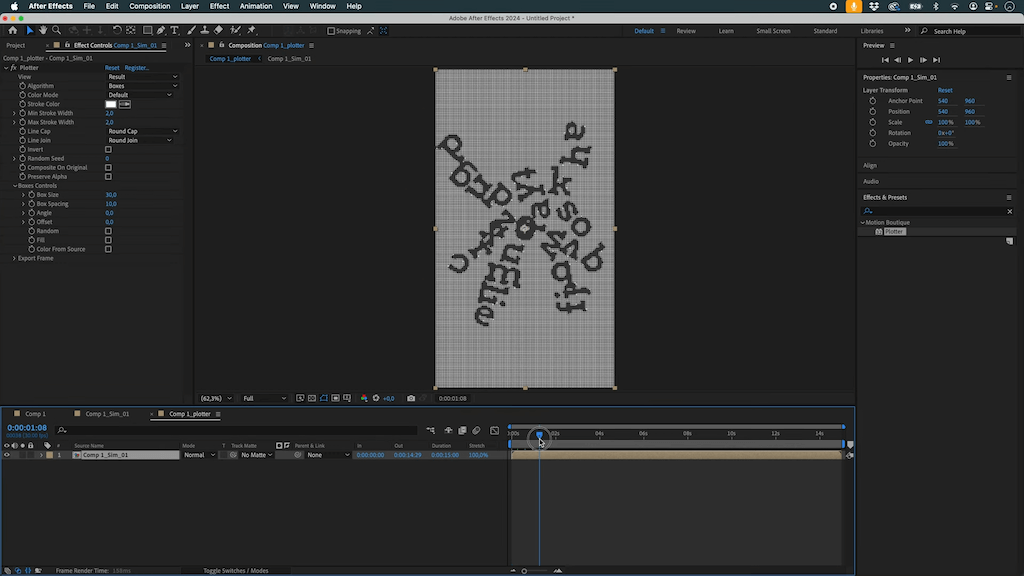
Step 5: Applying a Scribble Effect with Plotter
To enhance the animation:
- Place the Newton-simulated composition inside a new one.
- Add a black background layer.
- Apply the Plotter plugin and select a Linedraw filter.
- Adjust the inversion settings to align the lines properly.
- Introduce randomness in the lines to create a rough, hand-drawn feel.
Step 6: Adding Variation to the Effect
To make the animation more dynamic, we introduce opacity variation:
- Use a randomizer script (available on aescripts) to set random opacity values between 15 and 100.
- Modify contrast and levels to influence the final appearance.
- Apply Posterize Time to achieve a cartoonish effect at around 10 FPS.

Final Result
By combining Newton 4’s physics simulation, custom scripting, and Plotter’s artistic rendering, we achieve a dynamic, stylized typography animation that is both visually engaging and computationally efficient.
Try this workflow yourself and experiment with different settings to create your own unique variations!